

How To Prepare Your Long Natural Hair For A Wig?
Before putting on your wig, it's important to get your hair in the best condition possible. This will help ensure a secure fit and avoid any slippage throughout the day:
1. Brushing Your Hair
Taking the first step in your wig journey? Start by brushing your hair thoroughly to untangle and remove any knots, which will make it much easier to put on a wig cap and then your wig.

Just start with the ends of your strands, paying special attention as you work your way up to the roots. Opt for a wide toothcomb or brush specifically designed for detangling. Take it slow to protect and keep each strand healthy!
2. Securing Your Hair
Every head of hair is different, so it's up to you to decide which method works best for your mane. Here are some ways you can keep your locks in place:
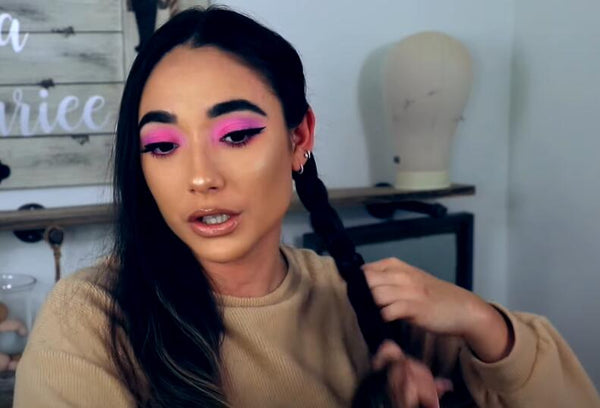
Method 1: Style your hair by braiding it around your head
Long natural hair can be styled in beautiful braid outs that have smooth textures! Simply follow these steps
Step 1: Section Your Hair
To make it clearer, you can divide your hair into two or four sections based on its thickness. If your hair is looking a little on the thin side, two sections will, above and beyond, successfully get the job done! But if have thick hair, four sections will do you justice.
Step 2: Loosely braid each section to the ends
Now it's time to start braiding! Begin your plaits from the roots: here at the base of your scalp.
If you're only doing two box braids, start them behind both ears. It's best to divide your hair up into three sections for braid created even sections left, center, and right. Pick one side, let's say the right, cross it over the center, and that's how to create a middle line.
Gather any excess hair from the sides and bring it all together in one place just in front of you with all portions combined, which forms the central part! Repeat on alternate sides until you reach the ends of your hair; don't forget to tie a tiny-tiny elastic band at the very bottom once finished!
Step 3: Create one braid and wrap it around your head
Take one of the delicate braids you've just made and wrap it around the top of your head. Lock the braid in place using a lovely bobby pin at the back of your head.
Drift the braid up and toward the front until it rests snugly against your scalp. However, pause energetically a few fingers widths away from where your lace front wig sits so that it remains camouflaged amongst the flashy hairline.
Now grab a couple of glittering bobby pins and stylishly secure that ravishing plait all along its circumference!
Step 4: Arrange the remaining braids on your head to complete the look

Last but not least, begin wrapping the second braid! Start behind the first braid, but make sure to hold it in place as you go by using a few sturdy bobby pins.
As you make your way around the front of your head, keep wrapping it until it's comfortably secured. Pay close attention to avoid overlapping the braids—this can create umps.
And that's it! You can now proudly show off your beautiful, long braid and don the wig of your dreams. It's time to flaunt the glamorous look you've been waiting for all day! Enjoy!
Method 2: Making Cornrows That Lay Flat Against Your Head
If you're looking for a protective style that will lay flat against the scalp, making cornrows could be an ideal option. Making cornrows is quite easy - here's how it works:
Step 1: Divide your hair
To create small sections in your hair, use a comb and divide it row by row. Create a part in a tiny section of your hair!

Start by drawing a line from front to back down the length of your scalp, beginning from one side of your head and then going all the way to the other. Maximize your look with a precise yet proportional hair portion by keeping the width no wider than 1 to 2 inches (2.5 to 5.1 cm)!
Step 2: Start braiding
Start at the front of your scalp with a single row. Divide it into three equal parts, starting from the very edge. Now comes the exciting part – you're going to switch up their positions!

Pass the right section below the centerpiece, and voila, you've created an entirely new "middle" section. You can keep changing these around and adding detail, but right now, let's take this one step further by moving the left part beneath the middle piece.
This will form an interlocking braid which is necessary for keeping your cornrows in place.
Step 3: Add hair to both sides of the braid to create an even line
Bring any hair from that row over toward the right part of the row. Exciting news: adding hair is just as simple! Add a small piece of Hair (maximum half an inch!) to the side to join it with the same row.

Attention: now blend it with the rest! You don't need to pull all of your dreads in different directions; this is not a French braid. With utter grace and beauty, start making those artistically intertwined braids – coming right up!
Step 4: Keep braiding the section until the end, and then use a hair tie to secure it
Woohoo! Keep your fingers busy and keep on braiding as you move down from where you'd started. When you reach the nape of your neck, add that handful of hair remaining in the region and tie tightly to create a beautiful braid.
Here ahead, all you have to do is secure what's already been intricately plaited together. Place a delicate hair tie no bigger than it needs to be and quick!
Step 5: Section by section, apply the same process across your entire scalp
Separate your hair into little portions, and get ready for an exciting adventure in braiding! Have fun with each portion as you work your way from side to side.
Get creative as you go, and soon you'll have a beautiful pattern of tiny French plaits that cover your entire head like a network of rows from the front of your head to the back of your hairline.
Finally, use hair ties to secure each braid for total perfection. You'll be amazed at how stunning it looks once you're done!
Step 6:Put your braids up in your hair using pins
Taking a few of the braid tails in your hands, give them a tight twist! Then, wrap them over the back of your head where your scalp meets the skull. Be sure to use some huge bobby pins to secure their position in place.
To complete the look, do the same with any remaining braid tails. Pay close attention, making sure not to overlap them as you move along. If the braid tails are thick and dense, it might be a good idea to pin each one in place separately for extra security.
And you have made it! You are now the proud owner of some beautiful cornrow braids. Feel free to accessorize them the way you like with cute hair clips, flirty sparkles, or other fun accessories. Enjoy your new personally designed hairdo, and show off your braiding skills with style!